09 10

Saturday, January 31, 2015

Kitchen Refresh for Less

Hello.  My name is Lori and I am a very bad blogger!  It has been over a year since I have posted on this site so let me give you some life updates and excuses for my absence.

Mr H and I moved from Cincinnati to my hometown of Lexington (KY) last fall for me to start Physician Assistant school.  Anyone that knows me, knows that I have been passionate about (more like obsessed with) medicine for as long as I can remember.  I have always felt called to the medical field and for me, I always assumed that meant attending medical school.  After college, however, my path took a turn towards research.  I worked in medical and clinical outcomes research at both the University of Kentucky and Cincinnati Children's Hospital for a few years until my hunger for a more clinical role could no longer be stifled.  Last fall my path was redirected and while I never imagined that my role in medicine would be as a physician assistant, I could not be happier with my path.  It is an incredible feeling to feel like you are exactly in the place where you are intended to be.  Enough with the personal statement, let's move on to DIYs and decor.

When Mr H and I found out that we were moving, we quickly snatched up a townhome in the Bluegrass and began painting and doing some updates before officially moving down.  We chose to rent for the duration of my program but we are truly chomping at the bit to hurry up and buy our dream home to do more permanent updates and projects. While we have literally repainted every room in our townhome, all of the sweat, spilled paint and ruined clothes have been well worth it.   Enough talk, let's get to the pictures . . .


One of the major barriers to renting, is making modern updates that provide impact without being permanent.  In this post, and posts to come, I hope to show renters and those with a small budget, how to refresh a room for less.  So, let's take a look at our kitchen refresh.


The kitchen was decent and functional when we moved in so while there were several things that I wanted to change such as the paint color, it was not very high on the priority list.  Within the last month we have finally transformed it into a kitchen where I am much happier to cook and do the dishes . . . ok, maybe not much happier to do dishes ;)

The first thing we tackled was the paint.  I'm not sure if you can tell from the photo above, but the original paint color in this room was a muted beigy-orange.  It was a golden color that all in all wasn't as horrendous as the Carolina blue that was throughout the place (nightmares of Carolina blue) but just wasn't my style or the look I wanted for the kitchen.

For the the first step in this kitchen refresh, we painted the walls Revere Pewter by Benjamin Moore.


The lighting is clearly better in this "After" photo versus the "Before" but man what a clean coat of paint does to a room!  We painted several rooms in our townhome Revere Pewter and I couldn't be happier with this paint color.  It is the perfect "greige".  It's not too cool like a lot of grays on the market and it's not too warm and buttery like a lot of other beiges.  The perfect marriage of the two makes the perfect neutral.

The next step was to make a window covering.  I followed the lead of many DIYers on the blogosphere and made a no-sew, faux roman shade.  Yes, you heard that right-no sew.  On my long list of to-do's in life, is learning how to use a sewing machine.  My mom is fantastic and has made many pillow covers and drapes for me over the years but I unfortunately lack that skill.  To make this faux roman shade, I bought fabric from Hobby Lobby and pulled out my handy dandy hot glue gun.


I measured the length and width that I desired for our window size, allowing enough fabric for a one inch seam on the left, right and bottom edges.  I ironed these edges to make a good crease and hot glued the seams.  On the top, I folded over about 2 inches to allow my curtain rod to pass through.  I ironed to get a crease and hot glued the top down, as well.  The last step was to pinch the fabric on the sides to make some decorative pleats.

It may not be perfect, but I'm pretty happy with the result and the fact that it literally took about 15 minutes to make.


One of the easiest, impactful changes to make in a kitchen or bathroom, is the cabinet hardware.  We have changed the hardware in every bathroom in our townhome and it has completely updated and upgraded the look of the room.  The best thing is, if you keep the original hardware stored away, you can just remove and take your new pulls and knobs with you when you move.

Due to the number of new pulls that would be needed for this space, I opted to update the pulls with paint.


While the shape of these pulls is not exactly my style, after spray painting them gold, they breathe new life into the room.  I love mixing metals and finishes in a room.  Don't feel boxed into using the same finish (chrome, polished nickel, etc) throughout a room. Mixed finishes actually give a room a very collected and complete feel.


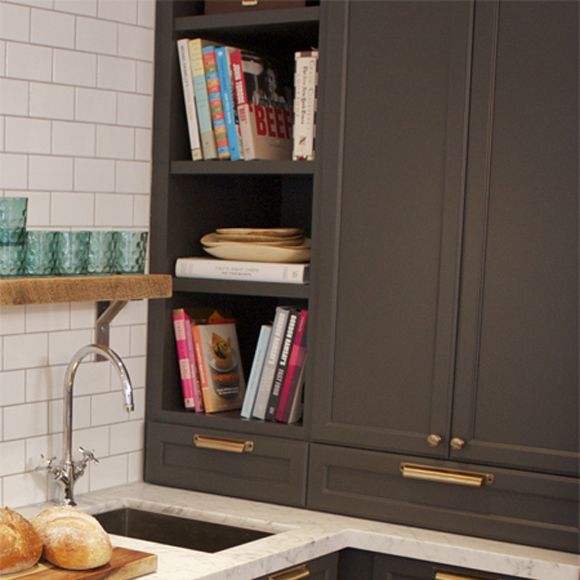
Trays are great decorative items for collecting and organizing small items into a larger grouping (as seen above).  For more visual interest, vary the height of the items on the tray.

Now for the elephant in the room.  The biggest non-permanent update with the biggest impact in this kitchen (and in most kitchens I would argue) is that lovely piece of jewelry sitting just south of the window sill.


No, not that one above.  The one, here, below.


I think it goes without saying just how foul and uninspiring the original, and by original I mean original to this older townhome, that first faucet is.  The new faucet is a serious game-changer in this kitchen.  In his first dabble in plumbing and faucet exchange, Mr H seriously impressed with his installation of this beauty.  Not to downplay his abilities whatsoever, but exchanging faucets is a fairly easy task for even the newest of DIYers. 


Isn't she just like the perfect statement necklace.  The lines, curves and vintage feel of this faucet truly makes my heart smile.

We exchanged several of the bathroom faucets before moving in and the new faucets really transformed those rooms just like here in the kitchen.  I'm only sad that I hadn't replaced the faucet in the kitchen sooner. 


In summary, in kitchens, much like bathrooms, updating these three things will make a major impact in the look of the space while proving to be not so permanent that it's impractical:
1.  Paint
2.  Cabinetry hardware-pulls, knobs
3.  Faucet


Now for the cost breakdown on this kitchen refresh:

Wall paint: Revere Pewter (BM)- $0 - leftovers from previous paint jobs
Spray paint (cabinet pulls): Rustoleum Metallic Gold- $0 - from my stash
Faucet:  Overstock- $80 (on sale 60% off!)
Fabric for Roman Shade:  Hobby Lobby - $10

This refresh was completed for a grand total of $90.


My hope is that this post inspires renters and those looking for non-permanent, inexpensive, ideas on ways to update and refresh a tired space.  While I would love to rip out the countertops and replace them with Super White Quartzite, and replace the sink with a white farmhouse style, that is neither practical nor realistic for our current season of life.

Sunday, September 8, 2013

{DIY} China Cabinet


Well, hello there. My name is Lori and I. am. a. bad. blogger! I apologize for the blogging hiatus. Mr H and I have had an extremely busy summer working on some personal "projects" that I promise to divulge when the timing is right (no mom, we are not pregnant :) ). With that being said, I've luckily had some time to get a few DIY projects completed which I promise to share with you in the next few days/weeks. 

Today's project evolved from Mr H and I not having anywhere to store and display our lovely wedding china and other dishes. I had specific dimensions and desires for a piece of furniture to house these dishes that I could not find after weeks of searching and scouring Craigslist. I became inpatient and really anxious to get our china out of their boxes, so I employed my secret little weapon I keep in my pocket . . .my dad!


My dad is an amazing craftsman and carpenter.  He has designed and built so many decorative and furniture pieces for me over the years.  After giving him the specific dimensions that I envisioned for the piece, he went to work and created and built a china cabinet that is more beautiful than I ever envisioned.  I wasn't with him when he constructed the piece so I can't show you the specifics and details of how he built it.  But Lord have mercy, he has done it again:


I decided early on that I wanted the shelves of the cabinet to be glass.  IKEA is a great source for glass shelves of different sizes.  Mr H and I made a trip to IKEA and picked up 3 of the Billy 30" x 10" glass shelves at $10 each.  Dad built the reinforced ledge for the glass shelf around the 2 sides and back of the cabinet.

Just look at the detail around the top:


I also knew that I wanted to paint the piece a darkish, moody gray.  After looking at lots and lots of images on the internet, I finally decided on "Down Pipe" by Farrow & Ball.  Here are some images of the paint color:


We hopped on over to Home Depot and had them color match the paint into Behr's primer + paint in one (such a great product!).  After 1 coat and some touch-ups I allowed the cabinet to dry for about 24 hours before inserting the glass shelves.


I absolutely love the paint color and the way it turned out.  Farrow & Ball carry many beautiful colors if you're in the market for paint.  If you order a paint fan from F&B you can have Home Depot or Lowes color match any hue for a lot less.  Here are some more photos of the styled cabinet:


The gold accents on the china look divine with the paint color.


The green, floral, cream and sugar containers in the photo above are part of my grandmother's china set.


Here are some more shots from our dining room.  The chandelier over the dining table is actually a DIY project from our wedding.  For months, I stalked Craigslist for old brass chandeliers.  These chandeliers were very popular in the 90's and as people have renovated and updated their homes, they have listed them on Craigslist for $10-$15 each.  I picked up 6 brass chandeliers of similar shapes and sizes and my dad and I painted them white, and adorned them with crystals.  At the wedding reception, we had a chandelier hanging above each reception table.

Photo by Kelli Baker of Simply Unique Photography


And the cake table:

Photo by Kelli Baker of Simply Unique Photography

I believe in filling your home with sentimental and meaningful things.  I love looking at the chandelier and remembering all of the time and effort we put into transforming each one and the emotion I felt when I saw them hanging in the reception tent for the first time.

Anyway, back to the dining room: 


My dad is brilliant and did an exceptional job on this china cabinet.  I am considering in the future possibly adding some gold hardware to the piece and maybe doing a treatment on the inside such as grasscloth wallpaper.  So stay tuned . . .

If you are ever in need of a very experienced and meticulous craftsman, don't hesitate to contact me at lori.craighazelwood@gmail.com.  My dad does professional quality at a reasonable price.

Hope everyone has had a restful and relaxing summer.  I am very excited for Fall and the new journey Mr H and I will be embarking on.


Saturday, June 1, 2013

Pantry Organization

Hope everyone had a great Memorial Day weekend! Mr H and I spent the holiday with both of our families in the Great Smoky Mountains.  The weather was beautiful and we had a great time exploring the aquarium, playing miniature golf (I won!!!! Probably first and last time ever!!), eating caramel apples (well, I did) and just hanging out and telling stories. It was a lot of fun but boy are we excited to be spending this weekend at home . . .doing projects (well I am, Mr H not so much ha).

Today's project has been a long time in the making!  We have been collecting the supplies for this project for literally months. Finally, after months of collecting, I give you:


When I started this blog, I vowed to myself  and to the readers to show the process and the failures-the good, the bad, and the downright ugly.  To be faithful to this vow and completely transparent, here's the unfortunate "hot mess" that our pantry had become (please don't judge!):


WOOF!  What. A. Disaster!  This was an organizational nightmare.  Pudding was stacked on top of an almond container, quickbread mix intermingled with Mr H's protein stuff and literally no chance of finding what we needed in less than 2 minutes.  In addition to not being able to find anything, or knowing what we actually had, I couldn't stand all of the random packaging.  I realize that the pantry, for the most part, is purely functional-holds food and other supplies- and shouldn't be decorated.  But, I couldn't stand the way it looked and decided it needed to be streamlined with an overhaul of epic proportions!

To achieve this overhaul without running to the store and buying all the canisters I could find in a day, I took the more cost-efficient route.  Over the last few months we have been saving every spaghetti sauce and random food jars we could find.  We removed the labels, used "Goo Gone" on the pesky remaining adhesive, and painted all of the lids gold for uniformity (Rustoleum gold spray paint-the best gold).  I picked up some of the Martha Stewart line bookplates and removable adhesive stickers at Staples to pimp out the jars:


These removable stickers were on clearance for $1 a pack!  After cleaning out the entire section, Mr H used some chalkboard paint that we already  had to make some DIY chalboard labels.  The Martha Stewart line carries a chalkboard removable label but of course they weren't on clearance.  And at about $5 for a pack of 2 (if I remember correctly) we decided we could easily make them ourselves.

We ended up purchasing a few jars and canisters because the spaghetti sauce jars weren't appropriate for all of our food-storing needs.  After comparing prices, Home Goods and TJ Max seemed to have the best selection, quality and price.  Most of the canisters that we purchased were about $2 each.  A lot of the lids of the purchased canisters were silver so we spray painted them gold, as well.

I pulled everything out of the pantry and began filling jars and canisters.  I attached our DIY chalkboard labels and used a chalk pen to label our goodies.  Just remember, when organizing, part of the process is making a bigger mess than you already had!


The key is to personalize the area to be the most functional and efficient for your family needs.  Not everyone needs a canister for protein or brown rice.  Sitting down and thinking/documenting what your family uses most will help make the space more tailored to your needs.  Also, not every food item can be removed from it's original container and poured into a clear canister.  Can you imagine scooping peanut butter out of its jar and into a clear canister?  That's not an efficient use of time!  So, for all those items that need to be left in their original packaging, baskets come to the rescue.   I picked up some medium and small black, plastic baskets at Target and have been very pleased with their durability!  I attached the Martha Stewart line bookplates to the plastic baskets and labeled accordingly.  For our needs, it made sense to label a basket for drink mixes (crystal light, hot chocolate, cider, etc), cans of food, baking and snacks.

Here's the final product:


 So much better!  Organized and contained!


Everything is so much easier to find.  Don't feel that you have to use all of the same shape or size of canister.  I actually like the variation between the spaghetti sauce (green arrow below) and the purchased jars:


The best thing about the labels is that they are removable AND erasable!  Just erase and change the label if you run out of rotini and don't need anymore.


The baskets have really worked well, so far.  Choose something that's easy to wipe down like plastic and durable enough to hold heavier items.


 The bookplate and label help organize the baskets with similar items:


Again, the key is to make it as functional for YOUR family as possible.  Here's one more look at the before and after:


Do you have issues with the organization of your pantry or any other area of your home?  Sometimes the easiest first step is to sit down and decide how you want that space to work for you or your family.  I don't claim to be an expert organizer but if you'd like any suggestions or a second opinion on your organizational needs, feel free to email me at:  lori.craighazelwood@gmail.com.  I'd be happy to share my thoughts and opinions on your space!

I enjoy our pantry so much more now and can't wait to organize a new space . . .on to the next room :)

xoxo,


Monday, May 13, 2013

{DIY} Custom Monogrammed Tray

I hope that all of you had a great weekend and were able to spend it with family. We were fortunate to have Mr H's family come in from West Virginia so that we were able to spend Mother's Day with both sides of the family. The ladies had brunch at The Glitz restaurant in Irish Acres Antique store outside of Lexington. To the ladies out there, if you have not been to Irish Acres or The Glitz, you must go. The men kept themselves busy, as well. We had a delicious dinner at my parent's house and a fun time playing games.

For mother's day, I wanted to create a present for our amazing moms.  On the web, there are many versions of this DIY project such as this inspiration tray at A Thoughtful Place (www.athoughtfulplaceblog.com):

rusticglam

 I wanted to attempt this similar tray with a bit of a twist:


I popped into Hobby Lobby in search of a photo frame for this project.  I found this drift wood/farmhouse looking frame and knew that it would be perfect.  It was on sale for 50% off so I snagged a couple of these beauties for $15 each.

Next, I headed over to the hardware and drawer pull aisle at Hobby Lobby and found some silver/platinum pulls with a little crystal bling.  I thought that the contrast between the rustic frame and glamorous pulls would be perfect.  The pulls were also on sale for 50% off and rang in at about $3 each.

I love monogrammed decor and accessories so I decided that adding a custom monogram to each frame would be the finishing touch for this custom tray.  I headed to another aisle in Hobby Lobby and snagged some glass etching cream.  It was not on sale, but I downloaded a 40% off coupon from the Hobby Lobby website and ended up getting the etching cream for about $5.


Glass etching cream


I played around in Word with different fonts and sizes to make my monogram stencil for the glass etching.  I liked Times New Roman the best with a font size of 250.  After printing off the letters for the monogram, I gathered an exacto knife and contact paper to begin the glass etching process.


I removed the glass from the photo frames and cut a fairly large (about 1/2 the size of the glass) piece of contact paper to smooth over the center of the glass.  You want the piece of contact paper to be large enough so that when you apply the etching cream, it does not escape the edges of the contact paper and etch sections of the glass that you don't intend to etch!

After applying the contact paper to the glass, I centered my printed letter on top of the contact paper.  Using an exacto knife, I carefully traced the letter, making sure that the cuts went through the paper and through the contact paper, below.


After tracing out the letter, I used the exacto knife to lift a cut edge of the contact paper.


 I peeled off the entire letter in preparation to apply the etching cream.


Next, I used a foam paintbrush to apply the etching cream over the letter.  This was the first time that I have etched glass so I wasn't sure how much cream to apply.  Basically, I applied globs or dollops.


I let the cream sit for 15-20 minutes to ensure that there was adequate time for the etching magic.  I used a paper towel to wipe off the excess cream being careful not to spread the cream on any uncovered glass or my skin (read the warnings on the etching cream before use).  Then, I peeled off the contact paper and ran warm water over the monogrammed letter and gave it a good wipe-down.

After etching the glass, the next step was to attach the drawer pulls to the photo frame.  Since we were driving to Lexington for the day, I had my dad help me drill the pulls onto the frame.  If you want this type of placement of the pulls/handles, make sure that the frame that you choose has a wide enough edge for attaching the hardware.

After attaching the pulls/handles, we have a custom, monogrammed frame that looks like this:


 I love the way the handles work with the rustic frame:


 And now, a few styled shots of this custom tray:


For about $21 and 30 minutes of work, you too can have a custom monogrammed tray.  I love that there are so many options with this tray.  An easy change-up would be to replace the cardboard backing that comes with the frame and add a piece of pretty fabric between the glass and cardboard.  Or, a collage of photos would be a nice touch.

I enjoyed making these custom trays for our moms for mother's day.  I consider  my first experience with glass etching to be a success!  I love the monogrammed glass so much that I might monogram everything I can get my hands on . . .watch out Sugar (the kitty cat)!!

xoxo,


Site Design By Designer Blogs