Today's project has been a long time in the making! We have been collecting the supplies for this project for literally months. Finally, after months of collecting, I give you:

When I started this blog, I vowed to myself and to the readers to show the process and the failures-the good, the bad, and the downright ugly. To be faithful to this vow and completely transparent, here's the unfortunate "hot mess" that our pantry had become (please don't judge!):

WOOF! What. A. Disaster! This was an organizational nightmare. Pudding was stacked on top of an almond container, quickbread mix intermingled with Mr H's protein stuff and literally no chance of finding what we needed in less than 2 minutes. In addition to not being able to find anything, or knowing what we actually had, I couldn't stand all of the random packaging. I realize that the pantry, for the most part, is purely functional-holds food and other supplies- and shouldn't be decorated. But, I couldn't stand the way it looked and decided it needed to be streamlined with an overhaul of epic proportions!
To achieve this overhaul without running to the store and buying all the canisters I could find in a day, I took the more cost-efficient route. Over the last few months we have been saving every spaghetti sauce and random food jars we could find. We removed the labels, used "Goo Gone" on the pesky remaining adhesive, and painted all of the lids gold for uniformity (Rustoleum gold spray paint-the best gold). I picked up some of the Martha Stewart line bookplates and removable adhesive stickers at Staples to pimp out the jars:

We ended up purchasing a few jars and canisters because the spaghetti sauce jars weren't appropriate for all of our food-storing needs. After comparing prices, Home Goods and TJ Max seemed to have the best selection, quality and price. Most of the canisters that we purchased were about $2 each. A lot of the lids of the purchased canisters were silver so we spray painted them gold, as well.
I pulled everything out of the pantry and began filling jars and canisters. I attached our DIY chalkboard labels and used a chalk pen to label our goodies. Just remember, when organizing, part of the process is making a bigger mess than you already had!

The key is to personalize the area to be the most functional and efficient for your family needs. Not everyone needs a canister for protein or brown rice. Sitting down and thinking/documenting what your family uses most will help make the space more tailored to your needs. Also, not every food item can be removed from it's original container and poured into a clear canister. Can you imagine scooping peanut butter out of its jar and into a clear canister? That's not an efficient use of time! So, for all those items that need to be left in their original packaging, baskets come to the rescue. I picked up some medium and small black, plastic baskets at Target and have been very pleased with their durability! I attached the Martha Stewart line bookplates to the plastic baskets and labeled accordingly. For our needs, it made sense to label a basket for drink mixes (crystal light, hot chocolate, cider, etc), cans of food, baking and snacks.
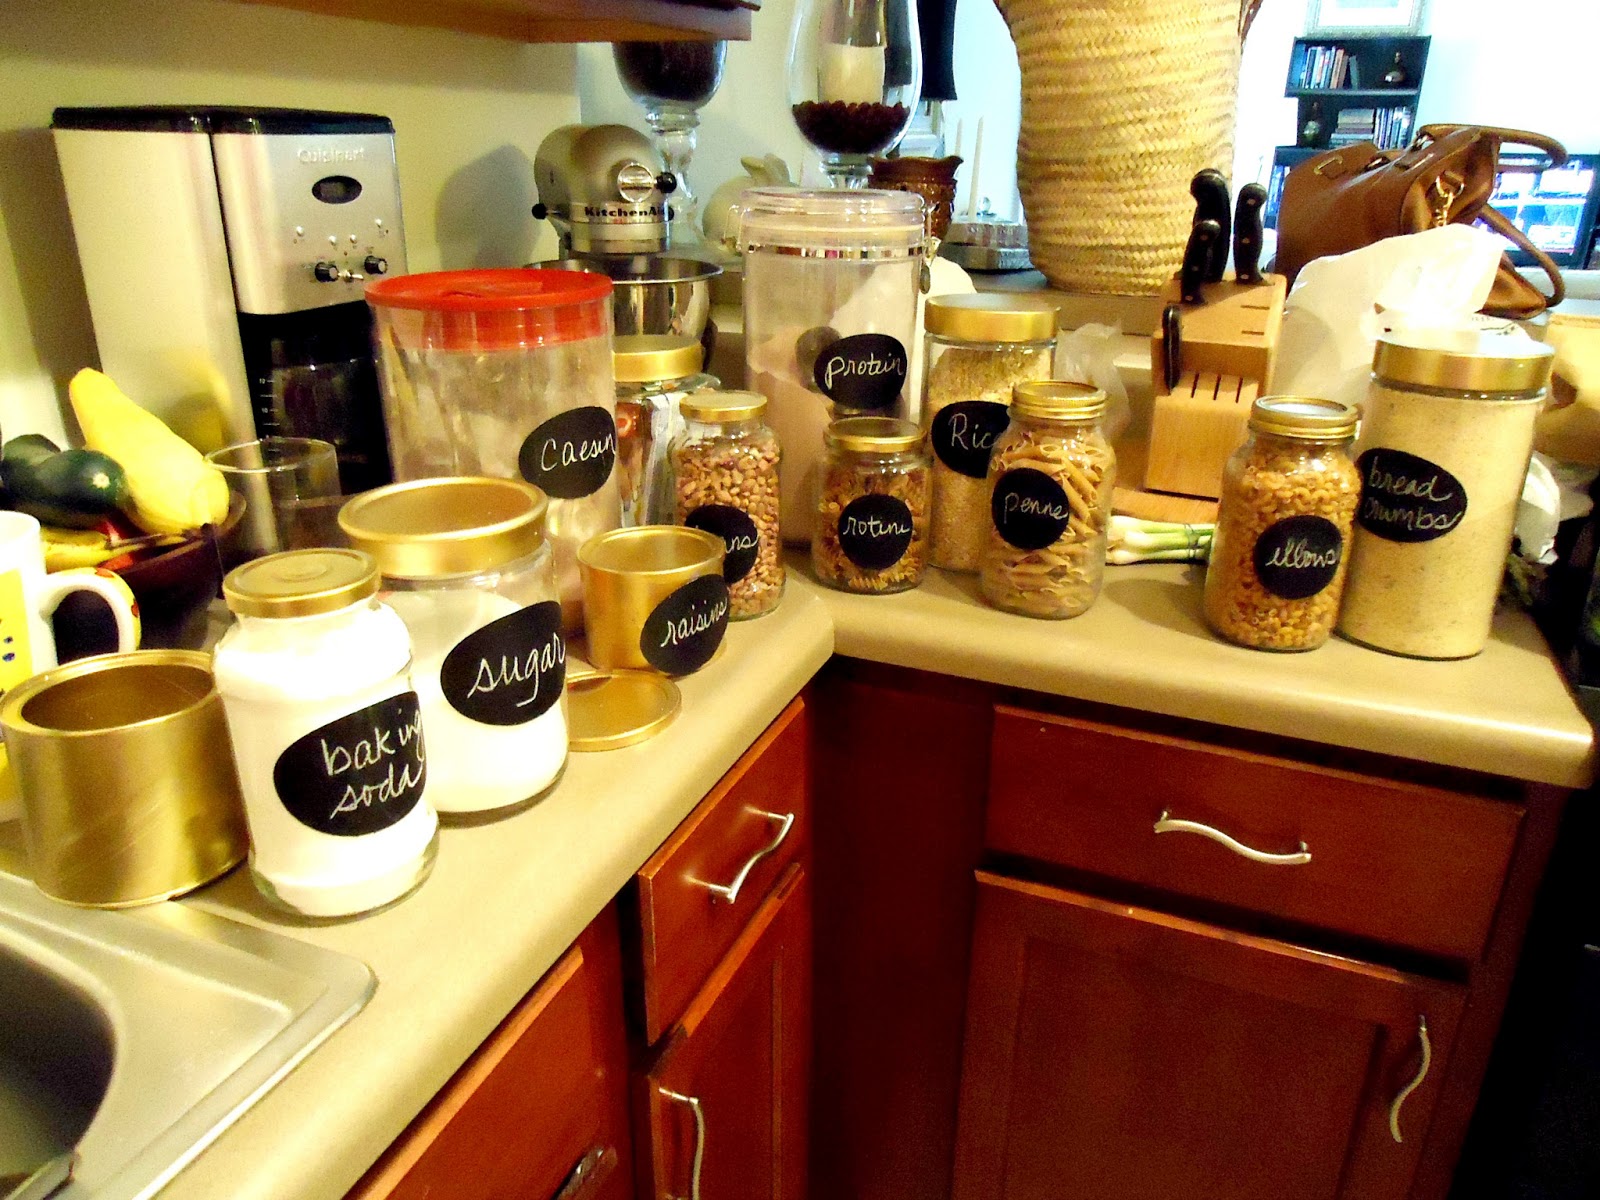
Here's the final product:

So much better! Organized and contained!

Everything is so much easier to find. Don't feel that you have to use all of the same shape or size of canister. I actually like the variation between the spaghetti sauce (green arrow below) and the purchased jars:

The best thing about the labels is that they are removable AND erasable! Just erase and change the label if you run out of rotini and don't need anymore.

The baskets have really worked well, so far. Choose something that's easy to wipe down like plastic and durable enough to hold heavier items.

The bookplate and label help organize the baskets with similar items:

Again, the key is to make it as functional for YOUR family as possible. Here's one more look at the before and after:
Do you have issues with the organization of your pantry or any other area of your home? Sometimes the easiest first step is to sit down and decide how you want that space to work for you or your family. I don't claim to be an expert organizer but if you'd like any suggestions or a second opinion on your organizational needs, feel free to email me at: lori.craighazelwood@gmail.com. I'd be happy to share my thoughts and opinions on your space!
I enjoy our pantry so much more now and can't wait to organize a new space . . .on to the next room :)
xoxo,

Lori,
ReplyDeleteI love your pantry! You inspired me to organize my cabinets using jars from the grocery store. I love the chalkboard labels and would like them for my jars. Can't wait to see what's next! Happy BD!
Love,
Mary Alice