For mother's day, I wanted to create a present for our amazing moms. On the web, there are many versions of this DIY project such as this inspiration tray at A Thoughtful Place (www.athoughtfulplaceblog.com):

I wanted to attempt this similar tray with a bit of a twist:
I popped into Hobby Lobby in search of a photo frame for this project. I found this drift wood/farmhouse looking frame and knew that it would be perfect. It was on sale for 50% off so I snagged a couple of these beauties for $15 each.
Next, I headed over to the hardware and drawer pull aisle at Hobby Lobby and found some silver/platinum pulls with a little crystal bling. I thought that the contrast between the rustic frame and glamorous pulls would be perfect. The pulls were also on sale for 50% off and rang in at about $3 each.
I love monogrammed decor and accessories so I decided that adding a custom monogram to each frame would be the finishing touch for this custom tray. I headed to another aisle in Hobby Lobby and snagged some glass etching cream. It was not on sale, but I downloaded a 40% off coupon from the Hobby Lobby website and ended up getting the etching cream for about $5.
Glass etching cream
I played around in Word with different fonts and sizes to make my monogram stencil for the glass etching. I liked Times New Roman the best with a font size of 250. After printing off the letters for the monogram, I gathered an exacto knife and contact paper to begin the glass etching process.
I removed the glass from the photo frames and cut a fairly large (about 1/2 the size of the glass) piece of contact paper to smooth over the center of the glass. You want the piece of contact paper to be large enough so that when you apply the etching cream, it does not escape the edges of the contact paper and etch sections of the glass that you don't intend to etch!
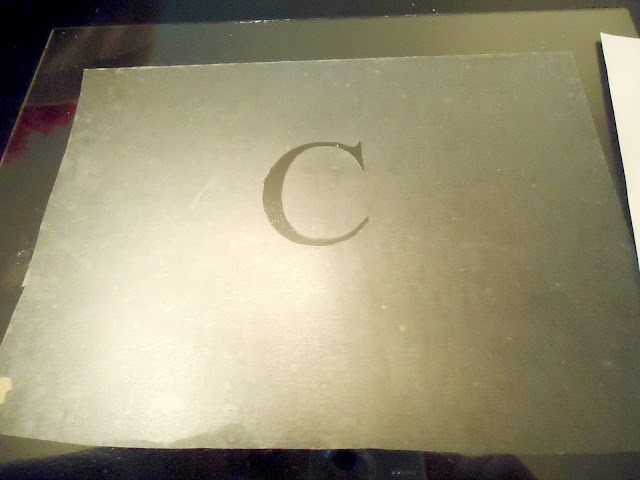
After applying the contact paper to the glass, I centered my printed letter on top of the contact paper. Using an exacto knife, I carefully traced the letter, making sure that the cuts went through the paper and through the contact paper, below.
After tracing out the letter, I used the exacto knife to lift a cut edge of the contact paper.
I peeled off the entire letter in preparation to apply the etching cream.
Next, I used a foam paintbrush to apply the etching cream over the letter. This was the first time that I have etched glass so I wasn't sure how much cream to apply. Basically, I applied globs or dollops.
I let the cream sit for 15-20 minutes to ensure that there was adequate time for the etching magic. I used a paper towel to wipe off the excess cream being careful not to spread the cream on any uncovered glass or my skin (read the warnings on the etching cream before use). Then, I peeled off the contact paper and ran warm water over the monogrammed letter and gave it a good wipe-down.
After etching the glass, the next step was to attach the drawer pulls to the photo frame. Since we were driving to Lexington for the day, I had my dad help me drill the pulls onto the frame. If you want this type of placement of the pulls/handles, make sure that the frame that you choose has a wide enough edge for attaching the hardware.
After attaching the pulls/handles, we have a custom, monogrammed frame that looks like this:
I love the way the handles work with the rustic frame:
And now, a few styled shots of this custom tray:
For about $21 and 30 minutes of work, you too can have a custom monogrammed tray. I love that there are so many options with this tray. An easy change-up would be to replace the cardboard backing that comes with the frame and add a piece of pretty fabric between the glass and cardboard. Or, a collage of photos would be a nice touch.
I enjoyed making these custom trays for our moms for mother's day. I consider my first experience with glass etching to be a success! I love the monogrammed glass so much that I might monogram everything I can get my hands on . . .watch out Sugar (the kitty cat)!!
xoxo,


I absolutely love my tray. I may want a gold animal too. Thanks for the wonderful weekend. We made some great memories.
ReplyDeleteI absolutely love my tray. I may want a gold animal too. Thanks for the wonderful weekend. We made some great memories.
ReplyDeleteI'm glad you like it! We had a really great time with you and Lucy, as well!
Delete